It's that time of year when homeowners start thinking about spring cleaning. Often, they have no idea where to start. The task can seem overwhelming before it even gets started. There is an easier way to tackle spring cleaning. Having a homeowner maintenance checklist can make spring cleaning seem more manageable, especially when it's divided room by room.
For example, you probably won't be sweeping out the fireplace when you're cleaning the bathroom. A checklist for each room will make it easier for you to remember all the household maintenance chores you need to keep up with, both inside and out in the yard.
Spring Cleaning Checklist for Home Maintenance
The first thing is to list the cleaning supplies you'll need. It'll save time when you're shopping for them at the store. It can include.
Paper towels
Dusting products and cloths
A broom
Furnace and even vacuum filters
Mop
Storage boxes/containers
Once you've gathered the cleaning supplies you'll need, it's time to create a homeowner maintenance checklist for each room. Here are a few examples.
Closets
Wash, fold, and store winter clothes
Wipe down closet shelves
Bring spring and summer clothes out of storage
Donate or throw away shoes and clothes that you no longer wear
Kitchen
Toss out expired spices, along with frozen and canned food
Defrost/clean fridge and freezer
Dust and clean all surfaces, including tops of cabinets and inside drawers
Clean all appliances
Empty "junk drawer"
Clean pantry and trashcan area
Bathrooms
Throw out old/expired makeup, personal care products, and take medications to an approved drop-off site.
Clean all mirrors.
Wipe down all surfaces, including the vanity.
Scrub the shower and tub, including the grout.
Clean all faucets, including showerheads
Scrub and disinfect the toilet, including the base
Replace the old shower curtain
Laundry Room
Organize all laundry supplies
Clean the lint trap and vent on your dryer
Clean the washing machine, inside and out - there are cleaners designed specifically for washing machines
Toss out and replace old laundry baskets
Bedrooms
Donate any clothing that you no longer wear
Organize closets - storage bins can help
Wash all bedding, including mattress pads and bed skirts
Flip the mattress- if it's not a pillow top
Dust all bedroom furniture - front, back, sides, top, and bottom
Clean and sanitize all kids toys - donate ones no longer used and organize the rest
Wash all stuffed/plush toys
Living/Family Room
Wash all pillows, blankets, and cushion/armrest covers
Clean/vacuum draperies
Dust ceiling fans
Polish all furniture
Vacuum couch and chairs
Dust lamps, including the shades
Sanitize all remotes
Clean all electronic devices, including all components of a home theater system
Shampoo all area rugs and carpets
Office
Dust all furniture including the desk and bookshelves
Organize any files, recycle paperwork that is not necessary
Sanitize all computer surfaces, including the mouse and keyboard
Dining Room
Dust all furniture
Clean china and polish silverware
Vacuum chair cushions
Clean any light fixtures
All Rooms
There are some spring cleaning chores that apply to all rooms, this includes,
Wipe down walls
Clean baseboards
Sweep, mop, vacuum all floor surfaces
Shampoo all carpeting
Clean vents
Replace filters
Clean windows, including curtains and blinds
Dust window sills and curtain rods
Replace batteries in smoke and carbon monoxide detectors
Clean doorknobs and light switches
Dust all pictures and other displayed items
When you're spring cleaning it only makes sense to tackle the garage and outdoor area. It is part of homeowner maintenance, and a checklist will make the task seem more manageable.
Garage
Declutter and organize
Clean windows, floors, and walls
Install storage containers if needed to stay organized
Replace garage door opener batteries
Clean garage door and frame
Outside
Clean out the gutters
Wash windows
Power spray dirt, grime, and mildew off the home
Trim trees and bushes
Mow and edge lawn
Spray off driveway and sidewalks
Once you have a spring cleaning checklist, keeping up with your home maintenance chores won't seem so daunting. The most important thing to remember is to have the right cleaning supplies before you get started.
For more spring cleaning and home maintenance tips, please visit Porch.com.
]]>
https://sheiners.com/blogs/news/how-to-keep-office-floors-clean-during-the-winter2021-01-18T10:58:57-05:002021-03-15T18:20:33-04:00How To Keep Office Floors Clean During The WinterVictor Sheiner
Ahhh, winter. The season of Hallmark card worthy snow scenes, crisp air, hot chocolate by the fire and…dirty office floors! Keeping a busy office space clean can be a challenge in the best of weather. When winter arrives, it puts commercial cleaning companies to the test to stay on top of the snow, salt and dirt that gets tracked inside.
While keeping office floors clean in the winter months can be difficult, there’s no challenge that a good commercial cleaning crew can’t overcome. Here are our tips on how to keep office floors clean and safe during the winter:
Shampoo the Carpets Before and After Winter
Before the winter dirt even arrives, you should start off the season withfreshly shampooed carpets. Even if the carpets don’t seem that dirty after the summer months, if you don’t start with a clean slate (errr, floor!) heading into winter, that increased winter dirt may be more noticeable quite quickly.
Once winter wraps up and the temperatures rise, you’ll want togive the carpets a good deep cleaning againto remove any lingering dirt and salt to prevent it from damaging your floors over time. Of course, you can shampoo the carpets more frequently (the Christmas holidays can be a convenient time if the office is empty) but should be done before and after winter at a minimum.
Use Entrance Mats to Keep Office Floors Clean
Using entrance mats is one of the most effective strategies to keep office floors clean during the winter. Also known as scraper or wiper entrance mats, these mats are typically dark coloured with rubber or vinyl backing to ensure the mat stays in place and to prevent water from seeping through to the floor below.
Entrance mats are designed to absorb and trap moisture and dirt from shoes and boots to prevent, or at least minimize, it from being tracked further into the building. As their alternative name (scraper or wiper mats) suggests, they also serve as a reminder and ideal place for people to stomp and scrape the snow, water, sand and road salt off of their boots.
Depending on your cleaning team’s responsibilities, this may or may not be within your scope of responsibility. Regardless, it never hurts to recommend that these are used because they ultimately lead to cleaner floors, which saves time and money on cleaning costs and will also help prevent slips and falls from wet floors.
Encourage an Indoor Shoe Policy
Similar to entrance mats, this isn’t a recommendation that’s necessarily specific to commercial cleaning companies but it still worth mentioning. Encouraging the adoption of an indoor shoe policy (that people entering the building must put on a clean, dry pair of “indoor shoes”) is another way to prevent water and dirt from being tracked into the building from shoes that people have worn outdoors.
This happens naturally in many offices, as staff don’t want to be wearing their winter boots all day, but if this isn’t the norm then a small bit of effort on the staff’s part can go a long way in saving on cleaning time and costs.
Vacuum Frequently to Remove Salt and Sand
Wet shoes in the office is one thing; when dirt and road salt get brought in that’s a whole other problem.
Dirt from shoes and winter boots can leave stains on carpets and the deeper it gets into the carpet, the harder it is to get out. While winter dirt is less damaging to floors, it doesn’t take much for them to appear dirty which nobody wants to see and can contribute to slip hazards if too much builds up in one spot.
Road salt is particularly bad for office floors and carpets. Road salt’s high alkaline content makes it corrosive, meaning it can not only stain a carpet (and it can happen pretty quickly!) but damage it over time.
The best solution to protect and keep office floors clean from winter dirt and road salt is to vacuum frequently. This minimizes the amount of time where a stain can set in and removes the dirt before it can become entrenched deeper in the carpet pile.
Mop Floors Frequently to Prevent Slips
Prevention is the best method for falls, so you’ll definitely want to implement our tips above to help in this department. Beyond keeping the floors dry in the first place, mopping hard floors on a regular basis can speed up the drying time to minimize slippery floors from wet shoes and puddles of water from melted snow. Mopping will also help remove traces of road salt, which can leave unsightly stains and damage floors over time.
Depending on the number of people in the office or building, floors may need to be mopped several times a day. If possible, try to plan this around busy times when water is most likely to build up, such as after the morning rush into the office or when people have come back from lunch.
—
There’s no doubt that in cold and snowy climates, it can be a challenge to keep office floors clean. Using our tips above and quality commercial floor cleaning products, you can keep winter outside where it belongs and maintain a clean and safe office environment for all.
Sheiner’sis proud to offer a full line of commercial floor cleaning products designed to keep office floors clean in the winter no matter what the weather outside looks like.View our online catalog today.
]]>
https://sheiners.com/blogs/news/ph-neutral-cleaning-products-benefits2021-01-10T11:37:46-05:002021-03-15T18:20:05-04:00Why Your Company Needs To Use PH Neutral Cleaning ProductsVictor Sheiner
Selecting products to stock your commercial cleaning pantry can be an overwhelming endeavor; there is no shortage of different cleaning products, ingredients and the benefits they promise to offer.
It’s tempting to grab the cheapest or most familiar products from the shelf or catalog. However, taking the time to properly research the commercial cleaning products available and selecting the ones that are truly right for your company’s needs will pay off in the long run in effectiveness, efficiency and customer satisfaction.
A common consideration when researching cleaning products is the pH level. Keep reading to learn more about the impact pH has on cleaning products and why you should purchase pH neutral cleaning products.
pH can only be measured in aqueous solutions, which any liquid solution that contains water (like cleaning products!). You cannot measure the pH level of solutions or liquids that don’t contain water, such as oil.
pH is measured on a scale from 0 to 14, which means that a pH neutral solution has a pH level of 7 instead of 0. A solution with a pH level of less than 7 is acidic, while anything over 7 is basic.
What is the pH of cleaning products?
Cleaning products can be found at all levels of the pH scale, which is why it’s important to do your research and check labels when selecting products to use or purchase. Products like bleach and oven cleaner are more basic and have pH levels above 7, while products like vinegar and toilet bowl cleaner are more acidic and their pH levels are below 7. Products in the middle are known as pH neutral cleaning products.
What does pH neutral cleaner mean?
Simply put, a pH neutral cleaner is one that has a neutral pH level. While a truly neutral solution has a pH level of 7, pH neutral cleaners are typically considered to have a pH level between 6 and 8.
Considering pH levels when selecting commercial cleaning products is critical to avoid damaging surfaces. While products that are more acidic or alkaline can be useful for certain surfaces or types of dirt, they also bring greater risks of harmful fumes and environmental damage.
What types of surfaces can you use pH neutral cleaning products on?
pH neutral cleaning productsare suitable for use on any type of surface. They are commonly thought of for use on floors but can be used on any hard surface including countertops, tables and appliances.
pH neutral cleaning products are particularly beneficial for sensitive or untreated surfaces such as natural stone and untreated wood. They should also be used whencleaning tile and grout, as well as other sealed surfaces such ashardwood floorsand stone floors.
What is a good pH neutral cleaner?
Sheiner’s is proud to offer a full selection of pH neutral cleaning products for everything from stone and tile to hardwood floors and all-purpose products.
What are the benefits of Using pH Neutral Cleaning Products?
There are many benefits to using pH neutral cleaning products for your cleaning company, such as:
Prevents Damage to Surfaces
Overall, using a pH neutral cleaning product means it’s safe for use on any surface. This is especially useful in environments with multiple surfaces, such as offices, where using the wrong product could have costly damages.
While pH neutral cleaners are intended for use on hard surfaces (essentially anything but carpet!), you can rest assured that they won’t damage any soft surfaces they may come into contact with such as carpets, clothing, towels or curtains. We’ve all seen what can happen when bleach ends up in the wrong places or other strong cleaning solutions touch surfaces they weren’t intended for, so thankfully using pH neutral cleaning products takes away this concern.
Safe For Use On Natural Or Untreated Surfaces
pH neutral cleaning products are particularly beneficial for untreated surfaces such as natural stone, tile and wood. These surfaces must be cleaned with care to ensure proper cleaning without damage and pH neutral cleaning products are ideal for this task.
Fewer Products for Your Staff to Carry Around
pH neutralcommercial cleaning productsthat are safe for use on a variety of surfaces means fewer products for your staff to carry around with them. This means less physical strain as the weight of the supplies they need to carry or push around with them is lower, cleaner storage areas and fewer difficulties with products running out while on the job or being out of stock of needed products.
Safer For the Environment
Commercial cleaning products with higher levels of acid or alkaline can have a greater negative impact on the environment than pH neutral ones. This applies both in the production process as well as the damage that can be caused from runoff water entering local water systems. pH neutral cleaning products are simplyless harmfulto every surface they touch.
Prevents Skin Irritation
Similar to how pH neutral cleaning products are safe for use on all surfaces, there is a much lower risk of skin irritation (both mild and serious) than other cleaning products. It is still, of course, recommended to use gloves when cleaning and to clean your hands after, but the neutrality means that if the cleaning solution does come into contact with skin it is less likely to cause irritation or other problems.
Lowered Risk of Toxic Fumes
Everybody, professional cleaner or not, has had moments where you have to leave a room because the fumes from a cleaning product are simply too strong. Heavy duty products like toilet bowl cleaner, oven cleaner and bleach are often the worst culprits for this experience. While proper ventilation is important when using any product, pH neutral products are less likely to create this problem and are much safer for those using them.
Toxic fumes or other reactions can also occur if cleaning products are mixed together (whether intentionally or by accident). The results of this can be particularly damaging, if not fatal. pH neutral cleaning products reduce this risk as the neutrality of their chemical makeup prevents these kinds of reactions from occurring.
Beyond comfort, these fumes can have serious health impacts both in the short-term (nausea, dizziness, headaches etc.) and long-term (respiratory problems, allergies etc.). pH neutral cleaning products prevent these fumes from occurring and create a safer cleaning and work experience for your company’s staff.
Easily Rinsed and Leaves No Residue
pH neutral cleaning products are easy to rinse off of surfaces, meaning they leave behind little to no residue. This lowers the chance of slippery floor surfaces from leftover residue and an overall better cleaning experience.
In summary, pH neutral cleaning products are better for the surfaces you’re cleaning, better for the environment and better for your staff. There are many pH neutral cleaning products available and they should be a standard product in any commercial cleaning company’s supply list for safer, more effective cleaning and ultimately higher customer satisfaction.
—
Sheiner’s Cleaning Productsis proud to offer a comprehensive line of pH neutral cleaning products.View our catalog online nowand bring the benefits of pH neutral, environmentally friendly and highly effective commercial cleaning products to your company today.
]]>
https://sheiners.com/blogs/news/how-to-clean-a-carpet-by-yourself2020-11-25T12:07:39-05:002021-03-15T18:17:45-04:00How To Clean A Carpet By YourselfVictor Sheiner
Are you procrastinating on a weekend morning wondering how to clean a carpet? Not just vacuum it but give it a real, proper cleaning? Even with your best efforts tokeep it clean and prevent stainson a daily basis, your carpet still needs a good deep cleaning from time to time.
If you’re wondering how to clean a carpet without spending an arm and a leg, you’re not alone. Unfortunately, bringing in a professional carpet cleaner can come with a hefty price tag that might not be in the budget.
Whether you’re wondering how to remove dog pee from a carpet in your house to how to clean your car’s carpets without paying for detailing, here is our guide on how to deep clean a carpet and remove carpet stains with ease.
How to Deep Clean a Carpet By Yourself
Carpet Cleaning Preparation
The first step in cleaning your carpet is to remove as much furniture as possible. If anything can’t be moved, cover the legs or base of the furniture with plastic (plastic wrap, plastic bag etc.) to prevent damage from your carpet cleaning products.
Next, give the carpet a thorough vacuuming. This will help remove as much dirt as possible so the carpet cleaner doesn’t have to work as hard. While you’re vacuuming, make sure to cover each area multiple times while going in different directions.
After you’ve vacuumed, the next step is to spot clean any noticeable stains. For the best results, use a trusted product like Sheiner’s ownCarpet Stain Cleaner and Odor Remover.
Vacuuming should always be done before you deep clean your carpet.
How to Use a Carpet Cleaner
Now that the furniture is out of the way and you’ve prepped the carpet by vacuuming and spot cleaning, it’s time for the real work to begin.
For the best results, you’ll need a carpet cleaner, also known as a carpet shampooer. There are a lot of different models out there, so it’s important tochoose the one best suited to your home and needs.
Carpet cleaners are affordable to rent but if you have the storage space, you may want to consider purchasing your own for the long-term savings.
Every carpet cleaner is unique, so it’s important to follow the manufacturer’s instructions. Generally speaking, however,this is the process you’ll follow:
Fill the carpet cleaner with water and yourcarpet cleaning solution. Do not fill the machine while it is plugged into an electrical outlet.
Run the carpet cleaner over the carpet, pressing the button that applies the carpet cleaning solution to the carpet.
Use the extraction mode/button to go over the same spot to remove the water and cleaning solution. You’ll want to go over it multiple times to remove as much water as possible. The carpet will still be a bit damp, but it shouldn’t be too wet and you shouldn’t be able to visibly see water still being sucked up by the cleaner.
If your carpet is particularly dirty, you may want to clean each area an additional time.
When cleaning is complete, wipe away any water or cleaning solution that may have gotten on the furniture to prevent future damage.
Allow the carpet to dry and avoid walking on it until it is fully dry. For faster drying, create as much airflow as possible by opening windows and turning on fans.
How to Clean Your Car’s Carpets
The process for how to clean your car’s carpets is actually pretty similar to the ones inside your house.
First, take the mats out of the car and give them a thorough vacuum. A vacuum is best as it will suck up dirt that’s buried deeper in the carpet, but a vigorous shake will also work if you don’t have a vacuum to use.
Next, spot clean any stains. If you live in a region with cold, snowy winters, you may find thecarpets are stained with road salt. To remove this, spray the stains with a mix of one part warm water to one part white vinegar.
After vacuuming and spot cleaning, clean the car mats as you would any other carpet. You can use a household carpet cleaner or you may want to rent or purchase one designed for cars and small spaces.
If the carpet cleaner has a small handheld extension, you can also use this to clean the upholstered seats in your car.
Finally, let the carpet and seats dry out thoroughly before using them again. It’s best to clean your car carpets once you’ve finished any outings for the day and can leave it overnight to dry.
How to Clean Some of the Toughest Carpet Stains
The instructions we’ve provided above on how to clean a carpet should work for most home carpets, even if you have to repeat the steps a few times! That being said, we all know thatsome carpet stains are harder to clean than others.
Here are our more in-depth tips on how to clean a carpet with some of the most dreaded stains; dog pee, red wine and mud:
How to Clean Dog Pee From a Carpet
The sooner you can address dog pee on your carpet, the better!
If you discover the dog pee while it’s still wet, absorb as much of it as possible with a towel, paper towel or rag. Then, blot the area with a damp cloth (but don’t rub it in!).
Once you’ve absorbed and blotted as much as possible, you’ll need to apply a carpet spot cleaning solution.Sheiner’s carpet cleaneruses enzyme cleaning that is highly effective for eliminating pet urine and feces stains.
If you don’t have this or another carpet cleaner on hand, you can also spray down the area with a mix of one part white vinegar to one part water.
Let either solution sit for a while, then blot the area with a towel until it’s completely dry.
There are few things worse than seeing a glass of red wine get knocked over and fall onto the carpet! Fortunately, there are lots of things you can do to remove a red wine stain.
First thing’s first, use a clean towel or cloth to blot and absorb as much of the wine as possible. Be very careful to simply absorb the wine and not rub it into the carpet. This will only make the next steps harder.
A common way to remove red wine from a carpet is to use club soda. Once you’ve absorbed up as much as possible, pour club soda on the stain. Then, blot it up as much as possible. Pour, blot and repeat until the stain is gone.
Don’t have any club soda on hand? Repeat the same steps as above but with a solution of two cups of water, a tablespoon of white vinegar and a tablespoon of dish soap.
How to Remove Mud From a Carpet
Whether it’s your car’s carpets or mud tracked across the living room floor, mud and dirt in your carpet can be difficult to remove.
Unlike other types of stains where you should attempt to absorb and blot them up as soon as possible, you’ll want to leave the mud to let it dry. Don’t rub or touch it, as the stain will only go deeper into the carpet.
Once the mud has dried (give it some extra time tocompletelydry beyond just the surface), go over it with a vacuum. Keep vacuuming until most of the dirt is picked up and the vacuum won’t suck up anymore.
Finally, mix a solution of one teaspoon of dish soap with one cup of warm water. Apply this to the stain, and blot the area until the stain is gone. After this, let the area dry before walking on it again.
What’s the Best Carpet Cleaner for Your Home?
Hard work and elbow grease only go so far when cleaning a carpet, you need the best carpet cleaner on your team as well.
How do you know what’s the best carpet cleaner for your home? Here’s what to take into consideration when choosing a carpet cleaning product:
Your Cleaning Requirements
Despite what advertisements might try to tell you, there is noonebest carpet cleaner. There is a carpet cleaner that is best for your specific carpet and needs.
To determine what’s the best carpet cleaner for your needs, think about what you want it to do. Are you looking for a deep cleaning product for a heavily soiled carpet or a regular-strength cleaner for routine cleaning? Do you need a carpet cleaner that will remove odours or are you more focused on highly visible stains?
What about the type of carpet; are you cleaning a low pile or a high pile carpet? What is it made of?
Ask yourself these questions when choosing a carpet cleaner to find the one that’s best for your specific needs.
The Ingredients
Some people are looking for the best carpet cleaner money can buy, some want the cheapest cost and others are concerned about the health of their family and the environment. You might even be a mix of these concerns.
Regardless of your priorities, the packaging will tell you what you need to know about the cleaner’s ingredients. Look for labels like whether theproduct is eco-friendly,made from natural products or if it’s safe to use around children.
Of course, we can’t talk about what’s the best carpet cleaner without talking about Sheiner’s.Our Carpet Stain Cleaner and Odor Removercomes in 32 oz. and 1 gallon sizes. It’s made in the USA and safe for use around children and animals. The non-toxic enzyme formula cleaning tracks and eats away the source of carpet odours and stains.
—
With the tips above, you can keep your carpet clean without the cost and hassle of bringing in a professional. Best of luck on your journey to a pristine carpet that will last for years to come!
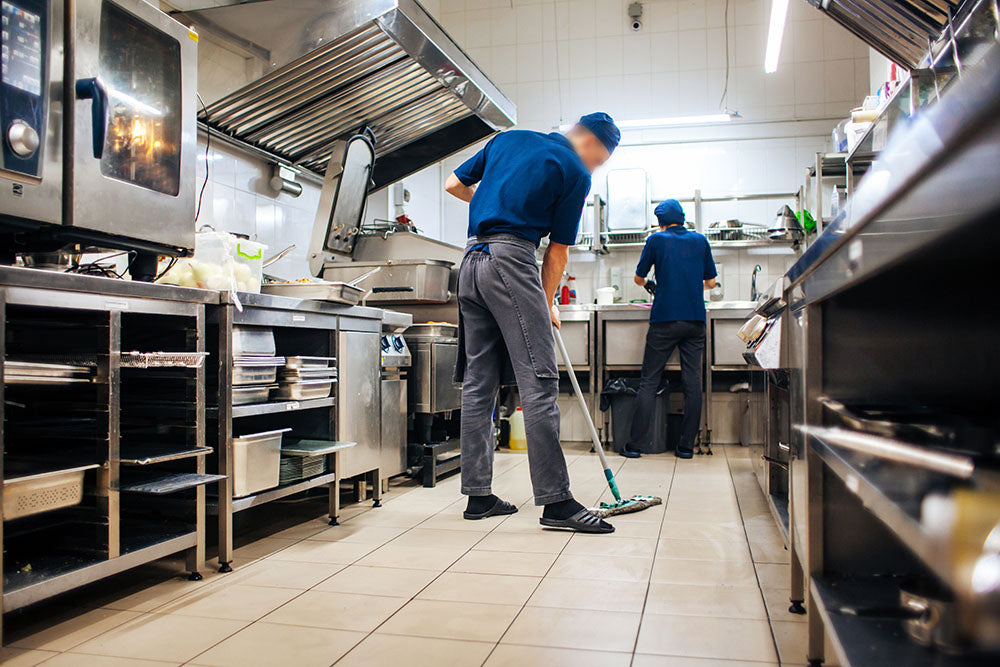
Keeping your commercial kitchen floor clean isn’t just about making it look nice, it plays an important role in ensuring the safety of your kitchen staff. Spills and other dirt on the floor can create a slip hazard, not to mention wear down your floor.
Use the following tips to keep your commercial kitchen floor clean and safe at all times.
1. Create a system - and stick to it!
Creating a system is one of the best ways to ensure commercial kitchen floor cleaning success. All cleaning staff should be trained on the procedures and up-to-date written copies should be available for reference.
Once a system is developed, cleaning duties should be scheduled and assigned to specific staff. Written logs of tasks completed should be maintained to ensure accountability. It is especially important to schedule and track tasks that don’t need to be done every day to ensure they are not overlooked.
2. Place warning signs and/or close the area
Always close off an area or place warning signs before you begin cleaning a commercial kitchen floor. Not only could someone walking through track in dirt and impede the cleaning process, but they also risk falling on a wet or slippery floor.
3. Sweep the floor first
Sweeping is too often overlooked as part of the commercial kitchen floor cleaning process when it’s actually a critical step. By sweeping the kitchen floor first, you’ll avoid simply moving around dirt with the mop. As great as commercial kitchen floor cleaning products like Sheiner’s are, the less dirt they have to work with to begin with, the better. Sweeping will also help prevent floor drains from being clogged with unnecessary dirt and debris.
4. Ensure the floor drains are clear
There’s nothing worse than starting to mop and rinse the floor then discovering halfway through that the water isn’t draining as it should!
All floor drains should be functioning and unobstructed to allow water and leftover cleaning solution to drain quickly and thoroughly. This will ensure the cleanest floor possible as well as eliminating the unnecessary build-up of dirt where the water may pool.
5. Clean the floor before other kitchen equipment
It’s often thought that cooking equipment and higher-up surfaces should be cleaned before the floor, but the opposite is actually true. Thorough cleanliness is of utmost importance in a commercial kitchen.
Cleaning the floors in your commercial kitchen first will prevent particles of dust and dirt from becoming airborne and landing on food processing equipment. In the case that they do, by cleaning them after the floors, you’ll ensure that every surface in the kitchen is properly cleaned and no dirt or germs are left behind.
6. Let the commercial kitchen floor cleaning product sit
Don’t mop the floor with your commercial kitchen floor cleaning product and then immediately rinse the floor. It’s best to let the product sit for a few minutes so it can really attack all of the dirt and grease on the floor.
7. Ensure the floor is thoroughly rinsed and dried
If the floor cleaning product you’re using requires rinsing (check the label - not all do!), make sure to thoroughly rinse away all of the cleaning product and dirt. Failure to do so can leave dirt and/or a residue behind which could make the floor slippery.
Make sure the floor has time to properly dry before removing the warning signs and opening up the area again. Don’t cut corners here; wait the full time necessary and check that all areas are dry or you risk injury for your cleaning staff or other patrons should they slip on a lingering wet spot.
8. Keep commercial kitchen floor cleaning equipment clean and stored off of the floor
What’s one of the best secrets to a clean commercial kitchen floor? Using clean equipment! Mops, brooms, buckets and other supplies should be cleaned on a regular basis so that dirt isn’t simply being pushed around on the surface you’re cleaning. This will also prevent cross-contamination of germs and food pathogens.
When you store your cleaning equipment, it should be stored off of the ground on hooks or on a cart as appropriate. This will help keep them as clean as possible while not in use, and also prevent unnecessary wear and tear to help them last as long as possible.
---
With our helpful tips and the right commercial kitchen floor cleaning products on hand, you’ll be on your way in no time to clean, sparkling floors even after the busiest and messiest of days in the kitchen.
]]>
https://sheiners.com/blogs/news/should-you-invest-in-a-commercial-floor-cleaning-robot2020-11-11T09:16:54-05:002021-03-15T18:16:06-04:00Should You Invest In a Commercial Floor Cleaning Robot?Victor Sheiner
The use of robotics continues to expand every year and the commercial floor cleaning industry is no exception. When investing in floor cleaning equipment for your company or cleaning service, you may not realize that a commercial floor cleaning robot is a tool you should consider.
Are you wondering exactly how a commercial floor cleaning robot works and whether it’s right for your company? Keep reading to learn about these autonomous cleaning tools and whether or not they could be in your future.
What is a Commercial Floor Cleaning Robot?
As its name suggests, a commercial floor cleaning robot is an autonomous machine designed for cleaning floors. Unlike their residential counterparts, commercial floor cleaning robots are larger and designed specifically for commercial use and closely resemble human-controlled floor scrubbers.
Commercial floor cleaning robots clean by following routes around a facility that have been programmed into their system. They are equipped with cameras and sensors to assist them in navigating a space and to stop before running into humans or objects in their path.
Pros of Using a Commercial Floor Cleaning Robot
They help maximize your employees’ productivity and efficiency
Commercial floor cleaning robots create a consistent cleaning experience
By taking away the task of cleaning floors your cleaning staff have more time to focus on the tasks that only humans can do
Improve cleaning staff turnover and satisfaction by eliminating one of their more repetitive tasks
Minimize the impact of staff shortages
You can start collecting data about your cleaning routines and use these to improve your scheduling and cleaning efficiency
By sticking to a programmed route, the increased efficiency also means they are more environmentally friendly by reducing the use of power and cleaning supplies
Commercial floor cleaning robots free up your cleaning staff for other tasks that can't be automated.
Cons of Using a Commercial Floor Cleaning Robot
They’re not well suited to every environment; they can’t go up and down ramps and narrow hallways can be difficult for them
Your staff may not want to adjust their existing tasks and routines to accommodate the commercial floor cleaning robot
They’re best suited to large spaces which may not make them feasible for your environment
Commercial floor cleaning robots can’t be used immediately upon purchase; you need to invest in staff training and your facility needs to be mapped so the cleaner can operate
Questions to Ask Before Investing In a Commercial Floor Cleaning Robot
1. Is our space well suited to a commercial floor cleaning robot?
Commercial floor cleaning robots work best in large spaces such as warehouse floors, airports, schools, hospitals and large retail spaces. They cannot go up ramps and are not well suited to narrow hallways. While they can move and turn on their own, they work best in environments where they can continue on a straight stretch for a period of time, instead of constantly turning and manoeuvring around furniture and other objects.
They are also best suited to a space that stays relatively consistent. If furniture or other objects are constantly being moved into the robot’s scheduled route, it will have to make many stops, forcing your staff to come and move the objects in its way. While this can’t always be avoided, this can be a frustrating time waster for your cleaning staff and takes away from maximizing the efficiency and autonomy of the commercial floor cleaning robot.
Commercial floor cleaning robots are best suited to large spaces such as school hallways, hospitals, large retail spaces and warehouses.
2. Do we have the time to invest in staff training and facility mapping or do we need a commercial floor cleaner that can be up and running in a short amount of time?
New technology is great, but the reality is that you can’t use a commercial floor cleaning robot “out of the box.” You should expect to spend several weeks teaching your staff how to use the new equipment, mapping routes of your facility and testing it out to ensure it is working as it should.
While the investment is certainly worth it, the time required may not be feasible for some organizations, especially if you are replacing old or broken equipment and need to get up and running quickly.
Mapping out routes for a large facility can take time, but the efficiency of a commercial floor cleaning robot will pay off in the long run.
3. What support is available for repairs and maintenance?
Make sure you understand what, if any, support is available from the vendor or one of their partners for repairs and maintenance. The last thing you need is to invest in new cleaning equipment that your own staff can’t fix! Ask about their level of support, response times and if there is training or resources for your own staff to take care of some or all of the maintenance required to keep your commercial floor cleaning robot in peak condition and to troubleshoot problems when they arise.
A commercial floor cleaning robot is an excellent choice for cleaning companies or teams responsible for large spaces that are looking to increase their efficiency. Use the information above to determine if one is right for your facility and to embark on a smooth transition to introducing this new cleaning technology to your staff.
]]>
https://sheiners.com/blogs/news/6-best-commercial-floor-cleaning-supplies-to-have-on-hand2020-11-08T11:59:46-05:002021-03-15T18:16:38-04:006 Best Commercial Floor Cleaning Supplies to Have On Hand?Victor Sheiner
When you run a commercial cleaning service, supplying your staff with the right commercial floor cleaning supplies is one of the most important keys to success. Great employees and hard work go a long way but at the end of the day, a good cleaning job requires the best commercial cleaning supplies out there.
Not sure what you should be stocking your supply closets and carts with? Here are some of the best commercial floor cleaning supplies that your company can’t simply can’t go without:
Commercial Floor Cleaner
It goes without saying that a good floor cleaning product should be the first thing to stock up on. After all, Sheiner’s wouldn’t even exist if plain water, a vacuum or a broom were enough to properly clean your floors!
Products designed for the floor in question will not only remove dirt the best but prevent damage to the surface and help achieve the desired finish. They can also ensure safe traction; using the wrong type of product could result in a slippery surface posing a risk to your staff and customers alike.
Carpet Stain Remover
Sometimes, carpet stains require a bit more power than your typical floor cleaning products. Make sure to supply your cleaners with a stain remover for spot cleaning as they go. Not only will your customers be happy to see those stains quickly disappear, it helps to preserve the carpet in the long-term and save time and money on more frequent deep carpet cleaning.
All-Purpose Cleaner
Yes, we’re contradicting point number one but hear us out. As much as you want to have commercial floor cleaning supplies that are as tailored to your environment as possible, a good all-purpose cleaner still has its place.
An all-purpose cleaner can save the day when you run out of a certain type of floor cleaner and pulls double-duty for cleaning surfaces beyond floors such as counters and sinks.
In spaces where your staff have to carry their cleaning supplies up and down the stairs, using just one all-purpose commercial floor cleaning product as opposed to multiple ones can save time and give them one less thing to carry. It is also useful when storage space is limited or you are looking for ways to streamline your supply costs.
Broom and Dustpan
While perhaps not a “supply” per se, a good broom and dustpan are a must-have for your commercial floor cleaning supplies. Sweeping up dirt and loose debris before using any other cleaning tools or products ensures a better cleaning job and can also prevent unnecessary dirt or debris from clogging up powered cleaners.
Mop or Floor Scrubber
Beyond a trusty broom, a mop or floor scrubber is another critical commercial floor cleaning supply for your staff. After all, those floor cleaning products weren’t designed to just sit on the floor untouched!
What you use will depend on the type of floor(s) needing to be cleaned as well as other factors such as storage space, obstacles in the space and budget. The right cleaning tool, combined with a high-quality floor cleaning product, will give the deepest cleaning possible and leave your floors shining when you’re finished.
Paper Towel
No, your cleaners won’t be using this to actually clean the floors. Regardless, paper towel is still a handy commercial floor cleaning supply to always have on hand. It’s great for spot cleaning, cleaning up drips or spills of water or cleaning supplies as well as for use on surfaces aside from floors.
Paper towel can even be a huge help for a bit of extra grip on lids that are stubborn about opening. While it may not be the first thing that comes to mind when creating a list of necessary commercial floor cleaning supplies, it’s one that simply can’t be left off.
---
The best commercial floor cleaning supplies are to your cleaning staff as a sidekick is to a superhero. As a cleaning service owner or operator, supplying your staff with the best tools and products on the market is one of the best investments you can make for happy staff and customers alike.
]]>
https://sheiners.com/blogs/news/5-best-types-of-commercial-floor-cleaning-machines2020-11-01T12:52:45-05:002021-03-15T18:15:29-04:005 Best Types of Commercial Floor Cleaning MachinesVictor Sheiner
Commercial floor cleaning machines have come a long way from the days of relying on tools like mops and buckets, basic vacuums and lots of elbow grease to get the job done. Whether you’re a facilities manager or you operate a commercial cleaning service, you need to not only hire the right people, but supply them with the right tools and cleaning products to get the job done right.
Here are some of the most common types of commercial floor cleaning machines and how they can help:
Floor Scrubbers
Floor scrubbers are one of the most common commercial floor cleaning machines out there. They dispense both water and a commercial floor cleaning solution, scrub the floor with a motor-powered brush and then suck up the remaining water and cleaning solution into a recovery tank. Floor scrubbers are an ideal commercial hard floor cleaning machine, especially for concrete, tile and laminated flooring.
There are many types of brushes and discs you can use for your floor scrubber depending on the type of floor, how abrasive you want the scrubber to be and whether or not the floor will be swept or vacuumed beforehand.
Floor scrubbers come in both walk-behind and ride-on models. Walk-behind models are typically easier to manoeuver and are better suited to smaller spaces such as offices. Ride-on floor scrubbers are well suited to larger areas and ones without much furniture or obstacles to navigate around such as school hallways, large office buildings, grocery stores and factory floors.
Floor scrubbers come in both ride-on and walk-behind models.
Sweeper-Scrubber Machines
Sometimes your cleaning team needs the best of both worlds, and a sweeper-scrubber offers just that. A sweeper-scrubber, as its name suggests, sucks up dust, dirt and light materials as well as applying water and a cleaning solution and sucking up the remaining water.
Using a sweeper-scrubber saves you time, allows you to purchase one machine instead of two and gives your floors a thorough clean with only one pass.
Robotic Floor Scrubber
Want to take the ease of cleaning the floors in your commercial space one step further? Consider investing in a robotic floor scrubber. They do all of the work of a floor scrubber as described above, but work autonomously. This allows you to save time and have your cleaning staff work on the areas that just need that human touch.
Floor Buffers
Despite their name, floor buffers are often used for both cleaning and buffing. Floor buffers are smaller than floor scrubbers and are operated by hand as opposed to ride-on. Floor buffers are great as a commercial hardwood floor cleaning machine for vinyl floor, tile, marble and more. They can also be used on carpet.
Floor buffers have a circular disk that rotates to scrub and clean, or buff, the floor with the help of the floor cleaning product that's been applied. There are many different options for speed as well as the abrasiveness of the cleaning pad depending on the type of floor and how dirty it is.
Commercial Carpet Cleaners
Commercial carpet cleaners work similar to floor scrubbers, except they are obviously used on carpets instead of hard floors. While all carpet cleaners work in a similar fashion, when you’re working in a large commercial space you’ll need to select one that’s up for the task. One designed for residential use may be cheaper, but will only cause you problems in the long run because it won’t be able to keep up or will break down.
Commercial carpet cleaners apply water and a carpet cleaning solution to the carpet below, and then suck up the remaining water and dirt to deposit it into a tank. Depending on how dirty the carpet is, you may need to do multiple passes to remove all stains and odours.
Carpet cleaners go a step beyond vacuuming to reach dirt that’s deep in the carpet pile, as well as eliminating stains and odours. How often you clean your carpets depends on how dirty they get and many people are walking over them. That being said, most carpets in commercial settings should be cleaned at least twice a year, if not more.
How Do I Choose the Best Commercial Floor Cleaning Machine?
When choosing the best commercial floor cleaning machine for your company, there is no right or wrong answer. Ultimately, it comes down to your unique facility, your cleaning team and the building's characteristics. Here are some factors to keep in mind when making a decision:
Budget
Time available for cleaning
Frequency of cleaning
Obstacles in the way (for choosing a ride-on vs. walk-behind machine)
Type of floor(s)
Your preferred commercial floor cleaning products
Storage facilities
It's time to put the mop and bucket away and invest in a commercial floor cleaning machine to save time, physical effort and achieve a deeper clean and brighter shine than ever before. Use our advice above to choose the best commercial cleaning machine for your facility and don't forget to check out Sheiner's catalogue of eco-friendly, top quality commercial floor cleaning products.Happy cleaning!
]]>
https://sheiners.com/blogs/news/why-buy-robot-mop2020-06-17T19:03:00-04:002021-03-15T18:14:20-04:005 Reasons You Should Buy a Robot MopVictor Sheiner
If you were to make a list of cleaning tasks around your home and rank them in order of preference, it’s probably safe to say that ‘cleaning the floors’ is near the bottom. It’s a necessary evil and one that often gets put off as long as possible because of the hassle and time it takes to do well.
Lucky for you, it’s 2020 and technology is here to save the day. By doing the job for you, robot mops are an excellent way to save time and ultimately do a better job of cleaning your home’s floors.
Here’s why it’s time for you to hop on board the robot mop train and buy one to help keep your home clean:
What is a Robot Mop?
A robotic mop is, as its name suggests, a robotic device that mops floors. You may be more familiar with robot vacuums but robot mops are essentially the same thing, except they mop instead of vacuuming!
There are many hybrid models that perform both functions (and can even detect when they’re moving to a different type of floor) while others are strictly a vacuum or mop.
The features of a robot mop vary depending on the model. At the very least, all robot mops have the ability to move independently around your living space, have a water reservoir and the ability to attach a mopping pad.
Beyond the basic functions, the possibilities are pretty endless; wi-fi connectivity for remote control, scheduled cleaning, the ability to return on its own to its charging base, mapping for improved efficiency and more. Features vary depending on the brand and model and new features and technologies are still being released on a regular basis.
Why You Should Buy a Robot Mop
1. Always Stick to Your Cleaning Schedule
With a robot mop’s scheduling capabilities you’ll never have to use being “too busy” or “too tired” to skip cleaning your house again.
Many smart mops include app integrations to create a cleaning schedule or for on-demand cleaning done through your smartphone. You can program both the date and time that your mop will run.
Even if your specific model doesn’t have an automatic scheduling feature, it’s hard to justify skipping cleaning when all you have to do is press the start button! Nothing beats a robot mop to keep up with cleaning on a regular basis and never stray from your schedule again.
2. Save Time and Hassle
Does anyone out there actually enjoy mopping their floors? Maybe...but if they do they’re probably not reading this blog.
Cleaning your floors is often one of those tasks that get put off as long as possible because of the different products involved, the hassle of moving around chairs and furniture, the waiting time for the floor to dry...
With a robot mop, the bulk of your cleaning (well, at least the floors) is done for you. All you need to do is fill the water reservoir, attach the mopping pad, press the button and then sit back and relax.
Even if you still prefer to do some cleaning by hand every once in a while or for a mess that’s a bit too much for your trusty cleaning robot, your job will be made much easier because of the regular cleaning your robot has done for you.
Whether you run it while doing other things at home or prefer to do it when you’re out during the day, robot mops are an excellent cleaning tool to help save you the time and hassle of cleaning your floors yourself.
3. Clean the Hard to Reach Spots
The back corner of your kitchen, the floor under the china cabinet...it’s not that you want them to be dirty, they’re just hard to get to! Luckily, robot mops can reach all of those tricky spots in your home and keep them clean so you don’t have to.
If you have some notably hard to reach spots in your home, keep that in mind when purchasing your robot mop. You may want to consider a smaller model that will fit in certain spaces or get one in a shape that’s designed to access harder to reach spots.
You might still need to get in there yourself every once in a while to make sure they’re truly clean, but it won’t be as bad as it might have been in the past if your robot mop has been visiting those nooks and crannies more frequently than you would have in the past.
4. Avoid Slippery Floors While You’re At Home
Slippery floors in your home aren’t just an annoyance, they pose a real hazard to you and your family. There’s no worse feeling than someone unknowingly walking onto a wet floor and it’s too late to stop them.
By running your robot mop during the day when no one else is home you can avoid the risks that post-cleaning slippery floors pose to your family. Just make sure to schedule the cleaning with enough time for the freshly mopped floor to completely dry before anybody comes home.
5. Regular Cleaning Helps Preserve Your Floors
We’ve already talked about how keeping up with cleaning can be a challenge to fit into your busy daily life. The other aspect to consider is the importance of regular cleaning for preserving your floors.
The longer dirt is left on your floors, the more it gets packed down or stuck into crevices. Depending on the dirt or other debris on the floor, it could even scratch the surface. Running your robot mop regularly will prevent the buildup of dirt to keep your floors not only looking clean but to preserve their lifespan.
Regular, or even daily cleaning, is probably necessary if you have pets that shed, children that track dirt in and out or just in general for high trafficked areas of your house like the kitchen or front entrance. Who has enough time in the day for that?
Set your robot mop to a schedule or push the button when it’s needed to prevent your family’s lifestyle from shortening the lifespan of your floors. That alone can help justify the cost of a robot mop.
Cleaning your floors regularly can also help get rid of allergens to improve the air quality in your home. This is especially beneficial for anyone with allergies, asthma or other respiratory challenges.
The Non-Robotic Smart Cleaning Alternative You May Not Have Heard of
If you’re looking to up your house cleaning game but not quite ready to go to the robot route, why not try a smart wet/dry vacuum? Many people aren’t aware of this, but there are many smart cleaning devices that use many of the technologies in robot mops and vacuums while still being handheld.
Look at Tineco’s Floor One Smart Wet/Dry Vacuum as an example. While it’s manually operated and handheld like traditional vacuums, it has a range of additional technologies and features to improve and enhance the cleaning experience.
Some of those special features include an LED display, app integration, smart sensors to detect dirt and adjust suction power and water flow accordingly, noise optimization and more. In other words, the perfect balance between technology and still being in control of cleaning your home.
Better yet, they work well with Sheiner’s cleaning products to get the sparkling clean home from your dreams without damaging the vacuum or any surfaces in your home. Robot mops and smart cleaning tools aren’t always cheap, so the last thing you need is damage caused by using them with the wrong cleaning products.
---
Have we convinced you to order a robot mop yet? The benefits are pretty undeniable. Robot mops allow you to save time, stick to your cleaning schedule and enjoy the benefits that smart cleaning technology has to offer. Pair them with the right cleaning products and you’ll get a sparkling clean floor without lifting a nail (or bucket).
Looking for cleaning products that work well with your new robot mop? Sheiner’s offers eco-friendly home cleaning products that are safe for your floors and your robot mop while creating an undeniable cleanliness and a pleasant scent.
]]>
https://sheiners.com/blogs/news/5-house-cleaning-safety-tips-for-national-safety-month2020-06-14T11:17:00-04:002021-03-15T18:14:50-04:005 House Cleaning Safety Tips for National Safety MonthVictor Sheiner
Cleaning your home may seem like a straightforward process, especially if you use the same regular routine to keep things tidy. However, there are some risky cleaning practices that can cause long-term harm to you and your family. In honor of National Safety Month, we want to share five important house cleaning safety tips:
1. When using harmful chemicals, wear rubber gloves.
Some household products contain chemicals which are known to cause immediate damage to your health, including to your skin. Here are some examples of how household cleaning products could harm your skin:
Volatile Organic Compounds (VOCs) can cause allergic skin reactions. VOCs are commonly found in dishwashing liquid, fabric softeners, deodorizers, and other cleaning products.
Synthetic fragrances can also cause allergic skin reactions. These are found in most “name brand” cleaning products to make the cleaners smell good. Artificial scents can even be found in cleaning products which are called “unscented,” because they’re added to mask unpleasant chemical smells.
Even gentle cleaning products can cause your skin to dry out or develop dermatitis over time.
Rubber gloves protect your hands and arms from coming into direct contact with harmful chemicals.
2. Always dilute concentrated cleaning products before using them.
Concentrated cleaning products are very environmentally friendly (and budget friendly!) because they require less packaging and can be used over a much longer period of time than regular “name brand” products. They’re called concentrated because the liquid has not been diluted or mixed with water, so it retains its full strength.
Before you ever use any cleaning product, check the label for warnings and instructions. If the label says the formula is concentrated, read the instructions to find out how to dilute the cleaner before using it. Otherwise, the cleaner will be too strong and could cause health problems.
Here’s an example of how to dilute a concentrated cleaner:
When you look at the Sheiner’s Floor Cleaner Concentrate bottle, you can see the word “Concentrate” very clearly on the label.
The bottle also specifies that the cleaner can make 128 gallons of cleaner once you dilute it.
The Sheiners bottle contains 1 gallon of concentrate. This means for every 1 gallon of warm water you use to clean your floors, you should mix in 1/128 gallons (or about 2 tablespoons) of Sheiner’s Floor Cleaner Concentrate into the water.
3. Ventilate each room before, during, and after you clean it.
According to the American Lung Association, breathing in VOCs and other harsh cleaning products can cause:
Headaches
Irritated eyes or throat
Cancer
Chronic respiratory problems
Other dangerous, long-term health problems
You can help prevent your family from experiencing these issues by ensuring your home is properly ventilated before, during, and after cleaning time. Open the windows and, if possible, turn on a ceiling fan or exhaust fan to help circulate the air. You can also use a plug-in fan or air purifier if needed.
4. Choose cleaning solutions which are safe for adults, children, pets, and even robot cleaners, if applicable.
Even if you take all the proper precautions to avoid direct contact with harsh cleaning chemicals, your family could still be exposed to the chemicals that remain on your furniture, floors, and in the air. For example, consider what happens if you use toxic carpet cleaner to help steam your carpets: The chemicals are steamed into your carpet, where your kids and pets crawl and play the next day.
Additionally, if you use robot cleaners such as a robotic mop, it’s important to choose products which will avoid damaging the interior and mechanics of the robot.
Sheiner’s cleaning products are all designed to be safe for humans, pets, and robots. Our solutions are enzymatic, meaning they break down stains and odors naturally and quickly. We also use pH-neutral solutions, meaning our cleaners are gentle on all surfaces.
5. Finally, secure cleaning products away from the reach of children and pets.
Even the safest cleaning products can be extremely dangerous or even fatal if your children or pets try to eat or drink them. Always keep cleaning products stored on high shelves, or in locked cabinets that are child- and pet-proof.
If your child does get a hold of cleaning products and ingest them, call the free Poison Control Help Line at 1-800-222-1222 as soon as possible.
For more information about safe cleaning, contact us! We would love to help.
]]>
https://sheiners.com/blogs/news/is-there-a-difference-between-eco-friendly-and-natural-cleaning-products2020-06-11T22:35:00-04:002023-03-02T16:44:17-05:00Is There a Difference Between Eco-Friendly and Natural Cleaning Products?Victor Sheiner
Eco-friendly, natural, green, organic, biodegradable...the list of terms thrown around for describing environmentally friendly cleaning products is pretty extensive. While often used interchangeably, there are both subtle and significant differences between many of them that you need to know as a consumer.
It’s important to understand the differences when choosing the cleaning products that are best for your home and the environment. Here’s what you need to know about eco-friendly vs. natural cleaning products and whether there really is a difference between them or not.
What is an Eco-Friendly Cleaning Product?
According to Merriam-Webster, eco-friendly means to be not environmentally harmful. As such, an eco-friendly cleaning product is one that will not harm the environment. Seems simple doesn’t it?
While the base definition of an eco-friendly cleaning product is fairly self-explanatory, that definition is often used liberally to mean different things. For example, eco-friendly doesn’t necessarily mean that a product is organic or 100% natural, despite what many companies want you to think.
Eco-friendly means the cleaning product itself will cause no harm to the environment. It doesn’t mean the product doesn’t contain chemicals, because not all chemicals are inherently harmful to the environment. Similarly, an eco-friendly product may not be all natural as synthetic products also don’t always imply harm or toxicity.
Eco-friendly cleaning products also don’t imply that the packaging is eco-friendly or that fossil fuels weren’t used in the production and transportation process. While most people are focused on the product itself, don’t forget about the bigger picture of the production process if you’re really dedicated to causing as little harm as possible to the environment.
The way the product is used also dictates whether it’s truly eco-friendly or not. Products labelled as eco-friendly should have an explanation of how it’s environmentally responsible on the packaging. This helps consumers understand their specific definition of eco-friendly and provide instructions on how to use the product in a way that will cause no harm.
What is a Natural Cleaning Product?
According to Merriam-Webster, natural means existing in or produced by nature: not artificial. As such, a natural cleaning product is one made from natural ingredients and contain no synthetic or artificially made ingredients. Seems simple doesn’t it?
Not so much. Similar to eco-friendly, the term natural is often misconstrued to mean things it doesn’t. There are also no regulations around marketing and labelling a product as natural, so do your research to figure out whether a product’s claims are true or not.
One of the biggest points of confusion around natural cleaning products is that natural does not necessarily mean chemical-free! Seeing chemicals in the ingredients list is not necessarily problematic as many common cleaning chemicals occur naturally, such as citric acid. If this is the case, having chemicals isn’t at all bad but simply the power of what nature can produce all on its own!
Natural cleaning products do not necessarily imply that they are organic either. An organic product is not only made up of natural ingredients but had no synthetic chemicals used at any point in the production process. Whether a cleaning product is organic or not will have no impact on its cleaning abilities and is ultimately a personal preference about the source and production process of your cleaning products.
If you’re looking for cleaning products that won’t cause any damage to floors or furniture, natural products are typically a safe bet but not a guarantee. Naturally occurring chemicals and ingredients can cause just as much damage as their synthetic counterparts or other chemicals and cleaning ingredients. Don’t presume that natural means safe; check the packaging for more details and always test new products on a small area first.
What are the Differences Between Eco-Friendly and Natural Cleaning Products?
Yes, there is a difference between eco-friendly and natural cleaning products. The short version is that natural cleaning products are almost always eco-friendly but not all eco-friendly products are natural.
Eco-friendly cleaning products will not, as mentioned above, cause harm to the environment when they are used or disposed of. Eco-friendly products don’t necessarily have to be all natural; just because an ingredient is artificially made doesn’t mean it will cause harm to the environment.
Natural cleaning products, on the other hand, generally won’t cause any harm to the environment but it’s still not a guarantee. Read the packaging to make sure and don’t forget to use it as directed to ensure no harm to the environment or what you’re cleaning.
When shopping for environmentally friendly cleaning products, make sure you know specifically what you’re looking for, do your research, read the labels and don’t be fooled by unclear marketing terms about how the products are really made.
Sheiner’s is proud to offer the highest quality eco-friendly cleaning products to consumers nationwide. View our product catalogue online and get ready to clean any surface while protecting the beauty of flooring and furniture.
]]>
https://sheiners.com/blogs/news/the-secret-to-getting-streak-free-windows2020-06-11T10:20:00-04:002021-03-15T18:13:53-04:00The Secret to Getting Streak-Free WindowsVictor Sheiner
Cleaning windows is rarely anyone’s idea of having fun. Adding to the hassle are the streaks that always seem to be left behind. Some people can look past the smears and accept them as part of the view, while others spend hours trying to wipe them away.
You don’t have to spend hours trying to wipe annoying smears on your window panes away. There’s a secret to getting streak-free windows. Best of all, it doesn’t take a lot of time or hard work.
Top 5 Tips for Streak-Free Windows
Getting clean windows without streaks is easier than you think. Here are five simple tips that will make the job quick and easy.
Use Distilled Water
This is a simple fix. Your tap water might look clean and be perfectly safe to drink but it contains mineral particles that show up on the glass. Distilled water doesn’t contain any impurities. Switching to distilled water will be a little more expensive, depending on the size and number of windows, but it will help prevent smears.
Clean with Vinegar
Vinegar, as a cleaner, has been in the news lately due to Covid-19. Vinegar will not only clean your counters, but it will also give you streak-free windows. There are various types of vinegar and not all work as a professional window cleaning solution.
You want to use white vinegar. It is non-toxic, antibacterial, and won’t irritate sensitive skin. To mix the cleaning solution, pour equal parts vinegar and water into a spray bottle. Another tip is to rinse off accumulated dust and debris before spraying the windows with the cleaner.
Less Soap is More
Nothing gets rid of dirt and grime like a lot of soapy bubbles but this is the last thing you want when you’re cleaning windows. Too much soap will leave residue behind that turns into ugly streaks and smears.
If soap is necessary, use it sparingly. In most cases, you’ll only need it to clean outdoor windows. A great recipe is to mix 2 quarts of water with equal amounts of rubbing alcohol. Then add only three small drops of liquid soap, any brand is fine.
Forget About Paper Towels
For many people grabbing a bottle of window cleaner and a roll of paper towels is natural. However, they’re often left with streaky windows. Paper towels not only leave streaks behind but also tiny pieces of lint. The more you try to wipe them away, the worse your glass looks.
A newspaper is a great option. Just make sure you only use the print sections. Glossy ads and the comic sections won’t be as effective and often leave streaks.
If you don’t mind spending a little extra money squeegees are a great option, along with microfiber cloths. Paper coffee filters are inexpensive and work great, along with old bath towels.
Buff Your Windows
You might still have window streaks even after using newspapers, distilled water, and vinegar. Don’t panic! You won’t have to spend hours trying to get rid of smears and smudges. Grab a coffee filter, clean cloth, etc. and buff the smear out. The process is just like buffing your car after a wash and wax.
After a couple of rubs on the smear, your windows will be sparkling and streak-free.
How to Get Rid of Window Stickers
Sometimes cleaning and buffing won’t be enough to get your windows streak-free. Stickers and decals are a problem when it’s time to get them off of the glass. Even if you manage to safely use a razor blade, knife, or another tool to scrape the sticker off, you’re still left with the glue.
There’s a quick and easy way to take care of this problem. It’s also relatively inexpensive. You can find a handy product known as “Goo-Gone”. Apply a couple of drops of the liquid cleaner to a clean cloth. With a little buffing, the cleaner will break down the glue so you can easily wipe it away.
Now you can clean your windows as usual without worrying about streaks.
Additional Window Cleaning Tips
Here are a few additional tips that will leave your windows smear and streak-free.
Rinse excessive dirt and grime off first
Never use bladed tools on glass
Avoid using Windex and similar cleaners on tinted glass
Getting rid of excess dirt before you start wiping down the windows will shorten the amount of time you spend scrubbing. If your windows are tinted, you want to avoid using certain cleaners. The chemicals can react with the tint leaving streaks that cannot be “cleaned” away.
Using sharp blades to remove stickers and decals is not only dangerous, it can scratch the glass. If this happens, your windows will never look perfectly clean.
Conclusion
Getting streak-free windows every time you clean them doesn’t have to be difficult. It also doesn’t have to take all day. Just by following a few tips, you might find that the chore isn’t as bad as you thought it would be.
]]>
https://sheiners.com/blogs/news/make-old-carpet-look-like-new2020-06-11T00:49:00-04:002021-04-14T09:42:45-04:00How to Make an Old Carpet Look Like New (Without Replacing It!)Victor Sheiner
Clean, smooth and fresh smelling carpets are an often underappreciated part of a living space. They’re simply there, doing their job day in and day out and certainly not the focal point of the room’s décor.
When a carpet doesn’t look so nice, however, is when it starts to draw attention. Nothing can bring down the look and feel of a home than an old, worn and dirty carpet. Unfortunately, between the cost and logistics, replacing a carpet isn’t always an easy task and you might be stuck with making the most of what you already have.
If a carpet replacement just isn’t in the plans right now, here are our tips on how you can restore your old carpet to help it look like new again.
Deep Clean Your Carpet With a Carpet Cleaner
If you’re serious about making your carpet look like new again, deep cleaning with a carpet cleaner is your first step. Whether you rent a carpet cleaning machine or call in a professional for help, shampooing your carpet with a high-quality carpet cleaner will make an immediate and highly visible difference.
Deep cleaning your carpet will help remove dirt that’s become deeply embedded in the carpet. This will not only freshen up the look in the short-term, but keep it looking clean and in good condition for many years to come.
Generally speaking, you should deep clean your carpet about twice a year. Ultimately, the frequency depends on how many people live in your house and how much foot traffic your carpets get.
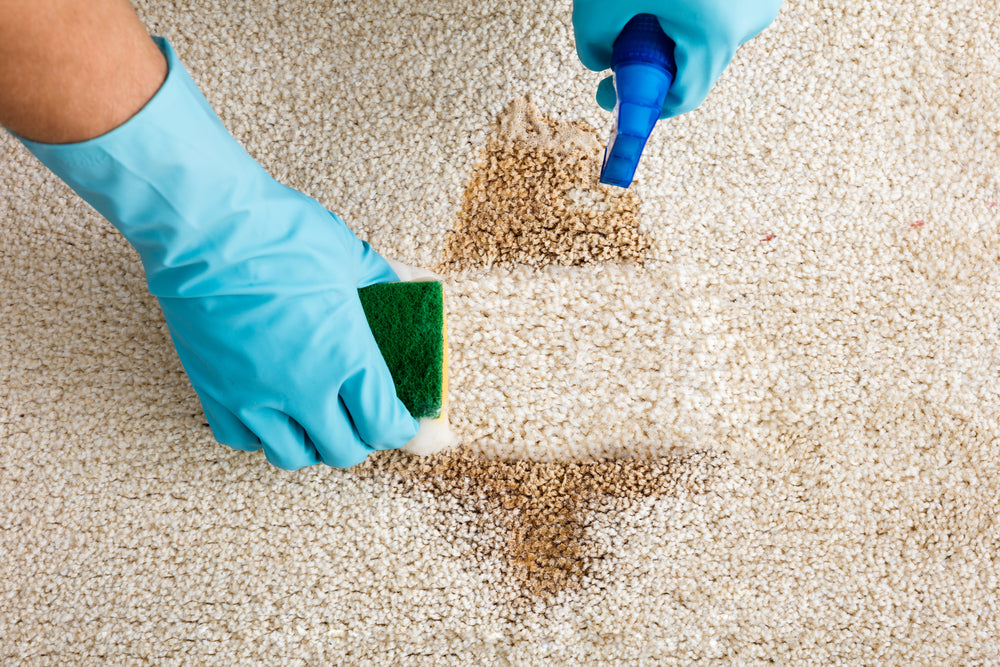
Spot Clean Any Stains
The best way to deal with stains and keep your carpet looking like new is to get rid of them right away. If that’s not possible or there are a few lingering stains, it’s not too late to make a difference. Getting rid of carpet stains can make a huge difference in the appearance of your carpet.
Sheiner’s Carpet Stain Cleaner and Odor Remover is one of the many great carpet cleaning products on the market. Simply apply a liberal amount to the stain and let it soak for at least 5-10 minutes. Then vacuum up or absorb the liquid, let the area dry and then vacuum one more time to clean up the area.
If you don’t want to use a store-bought carpet stain remover, you can use some products you probably already have at home. Try club soda or baking soda and vinegar to get rid of stains and restore your carpet to its former glory.
Get Rid of the Old, Musty Smell
Alright, this step may not contribute to the actual look of the carpet, but nothing leaves a worse impression than the smell of an old, smelly carpet!
A proper carpet cleaning as we mentioned above should make a big difference in getting rid of smells that are lingering in your carpet. If the carpet really has a strong odor, it might take a few cleanings.
When choosing a carpet cleaning product, make sure to choose one that specifically says it’s a deodorizer. Why have a nice looking carpet if it doesn’t smell nice?
If you’re looking for more of a DIY solution to remove carpet odors, baking soda could be your friend once again. Simply sprinkle baking soda over the carpet and let it sit for a few hours. Then, vacuum all of the baking powder up and the smell should go away with it!
Remove Carpet Indentations Caused By Furniture
Indentations from the weight of furniture take away from the look of a nice and smooth carpet. No one needs to know your furniture arrangement from five years ago!
The first step in removing carpet indentations should be to run the vacuum over them. Depending on how deep they are, this may be enough to help the fibers move back to their original positions.
If vacuuming away the indentations wasn’t good enough, you can try placing ice cubes on top of them and let them melt in place. It may sound crazy, but the coldness is another way to help the fibers regain their original shape and position. Once the ice cubes have melted, soak up any excess water with a cloth or sponge and use a spoon or your fingers to lift and fluff up the fibers.
You can also try giving the indentations a steam treatment to restore them to their previous condition. If you have a proper steam cleaner then this is a great time to break it out. If not, lay down a slightly damp cloth or tea towel and then go over the area with a steam iron. Leave the cloth in place for about 15 minutes afterwards, to let the dampness keep working its magic. After 15 minutes is up, remove the cloth and fluff up the fibers with your fingers or a spoon if necessary.
Trim Any Snags With Scissors
Carpet snags and loose fibers can make a carpet look old and worn. Fortunately, this problem has a fairly easy fix.
Simply take a pair of scissors and snip the loose fibers as close to the base as possible. Take care not to cut any other carpet fibers or you will be left with a lumpy, uneven carpet that may look even worse than the snags do!
Never pull out the loose fibers, no matter how loose they may seem, because this could cause more damage to the carpet.
Getting a clean and fresh looking carpet in your home doesn’t have to involve a trip to the carpet store. With Sheiner’s tips, you can restore your old carpet and get it looking like new again in no time. Good luck!
]]>
https://sheiners.com/blogs/news/how-to-remove-soap-scum-from-every-bathroom-surface2020-06-10T09:53:00-04:002021-03-15T18:11:42-04:00How to Remove Soap Scum From Every Bathroom SurfaceVictor Sheiner
You come home from work tired with one thing in your mind - a relaxing bath. As you enter the bathroom, something catches your eye in the bathtub. It’s that dreaded ring around your tub called soap scum. On checking the shower doors and ceramic tiles, the soap scum is present too.
Let’s face it. Cleaning the bathtub was not in your mind, but rather than let the soap scum problem get you down, learn how to remove soap scum. If you put it off, the soap scum will be difficult to remove.
Why you may ask. Soap scum builds up when the fatty ingredients in the bar soap react with the minerals in the water. With time, the buildup starts clinging to the surfaces of your bathtub. Every time you drain your tub or take a shower, you will have the dreadful layer soap scum on the surfaces.
Want to know how to remove soap scum from bathtub?
In this post, we demonstrate how to remove soap scum.
How to Remove Soap Scum From Shower Door
Your bathtub is not the only victim of soap scum buildup. As you shower, the minerals in the water also react with the soap creating soap scum. The good news is, you can learn how to remove old soap scum from glass shower doors. Here is what you need to do.
You can buy Sheiner’s cleaning products ideal for both professional and home use. In fact, our cleaning products are effective in removing grime, dirt and soap scum on all surfaces.
You also have the choice of preparing a homemade solution. To make your own cleaner, you need baking soda and distilled white vinegar. Pour one-fourth cup of white vinegar into a small bowl containing a cup of baking soda.
When you do so, the mixture will fizz. To prepare a paste, wait until the mixture stops fizzing. Take a microfiber cloth, dip in the mix, and apply on your glass shower doors.
Allow the paste to sit for 15 to 30 minutes before wiping down the glass surface with plain warm water and a microfiber cloth.
Rinse the surface and allow it to dry.
If the buildup is heavy, prepare the mixture above plus a cup of table salt in another bowl. Dip the cloth in the baking soda mixture before dipping it in table salt and wiping away the soap scum.
How to Remove Soap Scum in Bathtub
If you discover a gross layer of soap scum coating your bathtub, here is what you need to do to get rid of it. Use Borax, a natural mineral that is also used as a scouring powder and cleaning agent. The reason why is because Borax is a great deodorizing abrasive agent.
As such, it’s effective in removing soap scum from your bathtub. Besides removing soap scum, Borax kills mildew and mold.
To clean your bathtub with Borax, take a cup of Borax, two tablespoons of dishwashing detergent, and 2 cups of water. Mix these ingredients in a bowl to form a paste. Using a soft bristle brush, apply the paste to the affected area.
Allow the solution to sit for 15 to 30 minutes. Make sure that the paste does not dry completely. Take the soft bristle brush and begin scrubbing the paste way. If done correctly, the bristle brush will remove both the paste and the soap scum.
Pour warm water in the tub and rinse your bathtub. Using a microfiber cloth, dry the bathtub surface to remove traces of grime.
How to Remove Soap Scum From Tile
Glazed ceramic tiles make it easy to remove the soap scum. To remove soap scum from ceramic tiles, we recommend using our commercial cleaning products. Alternatively, you can prepare a homemade cleaner. Pour a cup of baking soda and a one-fourth cup of distilled white vinegar in a bowl.
Use a microfiber cloth to apply the mixture to the affected area. Later, rinse with warm water and a clean cloth. If the buildup is heavy, use a wet pumice stone. This will allow you to scrub the soap scum away.
Remember, do not use the pumice stone when dry. Doing so will cause excessive scratching and leave black marks on your ceramic tiles. Also, do not use the pumice stone on your glass shower doors or fiberglass bathtub.
Alternatively, use a power washer.
How to Remove Soap Scum From Fiberglass Shower Doors
Fiberglass shower doors are attractive and a great addition to your bathroom. But they can quickly become dull as a result of soap scum buildup. The good news is, you can remove the soap scum and make the shower doors look good again.
You can buy our commercial cleaners formulated for fiberglass shower doors and tub. But remember, fiberglass cannot stand up to abrasive scouring pads and harsh cleaning agents. To make your homemade cleaner, prepare a cup of baking soda and a one-fourth cup of white vinegar.
Mix in a plastic bowl and allow the mixture to stop fizzing. Take a microfiber cloth, dip it in the mix, and apply on the fiberglass shower doors. Allow the mixture to sit for 15 to 20 minutes. Take a sponge, dip it in clean water, and rinse the fiberglass shower door.
Dry the surface with a clean cloth.
If the buildup is heavy, use hydrogen peroxide instead of distilled white vinegar. Just add a tablespoon of hydrogen peroxide into the cup of baking soda.
Final Thoughts
There are several ways to avoid soap scum. First off, switch from bar soap to liquid body soap. Liquid body soap is a detergent. As such, it will not react with minerals in the water to form soap scum.
Second, before taking a bubble bath, add a quarter cup of baking soda or Epsom salt. This will soften the water and prevent soap scum buildup. Also, it will make your bath to be smooth as silk.
Lastly, always dry your shower and bathtub with a microfiber cloth after use.
]]>
https://sheiners.com/blogs/news/10-headache-causing-household-chemicals-to-know-for-national-migraine-and-headache-awareness-month2020-06-09T11:28:00-04:002021-03-15T18:09:55-04:0010 Headache-Causing Household Chemicals to Know for National Migraine and Headache Awareness MonthVictor Sheiner
Every June, organizations like the American Migraine Foundation (AMF) join with doctors and patients to raise awareness about headache disorders. AMF explains that many people with migraine experience a migraine attack when they are triggered by environmental factors including:
Can Household Cleaners Cause Headaches? Yes, household cleaners can cause headaches, migraine, and other health problems, including cancer. The American Lung Association explains that harmful household cleaning products contain headache-causing elements such as:
Volatile Organic Compounds (VOCs) which can directly cause health issues or combine with other chemicals in the air to create pollution
Fragrances which can cause allergic reactions
Irritants which can further exacerbate any normal allergies you experience
What Are Other Side Effects of Inhaling Cleaning Products? In addition to causing headaches, the American Lung Association says other side effects of inhaling cleaning products could include:
Irritated eyes or throat
Allergic reactions (including migraine attacks)
Cancer
Chronic respiratory problems
Which Household Cleaners Contain VOCs? There are dozens of VOCs, but not all of them have been proven to negatively impact your health. VOCs which are known to be harmful include:
Acetone — This VOC is found in household cleaning products such as nail polish remover, lacquer, and varnish. If you use products with acetone, you may notice a burning sensation in your eyes, nose, and throat. You could also experience nausea, mood swings, and dizziness.
Dichlorobenzene — This chemical is often used to control moths, mold, mildew, and bathroom odors. You might find it in your home’s deodorizers or moth balls.
Ethanol — Not only is ethanol highly flammable, but it can also cause headaches and coughing if you inhale it while cleaning. Ethanol could be found in hand sanitizers, windshield wiper fluid, and even perfume.
Terpenes — This chemical can irritate your nose, eyes, throat, and head, and also has the potential to harm the ozone layer. Terpenes can be found in many types of household cleaners and air fresheners.
Check the label of your household cleaners, and keep in mind that these common VOCs may be listed under a different name in the ingredients list.
Which Household Cleaners Contain Fragrances? Any fragrances, both natural and artificial, could give you a headache if they irritate your eyes, sinuses, or throat. In fact, several VOCs that we listed above are commonly used to scent household cleaning products. For example, UC Berkeley reports that terpenes are found in pine, lemon, and orange oils that give cleaning products and air fresheners a bright smell. Fragrances can also be manmade, meaning they are artificial or synthetic. The Children’s Environmental Health Network (CEHN) reports many synthetic fragrances contain chemicals including:
Petrochemicals — In other words, petroleum-based chemicals
Phthalates — Used in soaps, shampoos, and detergents
Benzene derivatives — Used in paint or varnish removers, furniture wax, and detergents
Aldehydes — Used to make detergents, soaps, and resins
Toluene — Known carcinogens which could cause cancer
To avoid harmful chemicals and fragrances in your household cleaners, look for labels that say “fragrance free” rather than “unscented”. Unscented products may actually have fragrances added to them to mask other scents!
How Can You Avoid Getting Household Cleaners Containing VOCs and Fragrances? Our family started Sheiner’s to offer natural, safe home cleaning products. Our products clean effectively while also preventing your family, kids, and pets from inhaling any harmful chemicals. Every product is also pH-balanced to avoid damaging any surfaces you clean. Check out some of our most popular natural cleaners, which all have light, fresh natural scents: Natural Floor Cleaners:
Sheiner’s Floor Cleaner Concentrate helps you save money because it needs to be diluted with water before use. Use it on tile, linoleum, stained concrete, and other floor surfaces.
Sheiner’s Stone & Tile Cleaner is great indoors and outdoors for marble, granite, limestone, Travertine, slate, stone, and concrete floors. You can also use it for ceramic, porcelain, and non-porcelain tiles.
Sheiner’s Hardwood Cleaner is safe for wood and laminate floors. And like the other two floor cleaners listed above, it’s safe to use in your robot mop.
Natural Stain Remover:
Sheiner’s Pet Stain & Odor Remover is a safe product to use when you have pets around. Use it on your floors, furniture, rugs, clothing, car seats, and more.
Natural Glass Cleaner:
Sheiner’s Window & Glass Cleaner is ammonia free, so don’t worry about a heavy, lasting odor. It’s easy to clean your windows and glass streak- and residue-free with Sheiner’s.
Sheiner’s All Purpose Cleaner can be used on everyday surfaces like floors, counter tops, bathrooms, tiles, and more.
]]>
https://sheiners.com/blogs/news/how-to-safely-sanitize-your-toddler-s-toys2020-06-04T16:18:00-04:002021-03-15T18:07:28-04:00How to Safely Sanitize Your Toddler’s ToysVictor Sheiner
Toddlers and young children have a well-deserved reputation for being walking Petri dishes of germs! Toddlers love to put things in their mouth, which both leads to them frequently picking up germs and spreading them to others.
Health and safety are one of your top priorities as a parent. While toys bring joy and educational moments to your child’s life, they’re also a prime source of germs. Here’s our advice on how to safely sanitize your toddler’s toys at home.
How to Sanitize Plastic Toddler Toys
Before you get to any sanitizing, you’ll simply want to clean the toys first to remove any dirt. Wipe them down or place them in hot soapy water (dish soap is fine) and use a brush if needed to clean hard to reach places. Rinse them under clean running water before sanitizing, as soap may impact the disinfectant.
After you’ve cleaned them, either thoroughly wipe them down with a disinfecting wipe or soak them in a disinfectant, such as a mix of 2 teaspoons of household bleach for every 4 cups of water.
Check the disinfectant’s bottle for the contact time, which is how long the disinfectant needs to remain on the surface for it to be effective. For disinfectant wipes, this is typically ten seconds, for the provided bleach solution it is two minutes.
If you’re using bleach to sanitize toys (or well, anything!) you must never mix it with other household products as this can create a toxic reaction between the chemicals.
Check the label of the disinfectant to see whether it requires rinsing or not. Afterwards, let the toys thoroughly air dry before letting your child play with them again.
Plastic toys with holes in the bottom, such as bath toys or ones that squeak, can be problematic to clean and should be done with caution. Water and sanitizing solutions can get inside the hole and become trapped. When this happens, this presents the risk of your toddler ingesting cleaning solution that hasn’t evaporated or mould could start to grow.
When sanitizing these toys, be sure to squeeze and shake them to get out as much water as possible and then let them thoroughly dry before letting your child play with them again.
Looking to save some time on cleaning? Use your dishwasher! Solid plastic toys can be placed in the top rack of the dishwasher. When you turn on the dishwasher, select either the normal or sanitizing cycle along with heated drying. Ensure they are thoroughly dry before you let your child play with them again, either by letting them completely air dry or wiping them dry with a clean towel.
How to Sanitize Plush Toddler Toys
Plush toys that don’t contain any sort of battery or electrical component can simply be washed in the washing machine. Check the care label to make sure, but the vast majority of plush toddler toys are safe to clean this way.
Simply place the toys in the washing machine, add your preferred detergent and run them on a gentle cycle with hot water. For added protection, you may want to place the toys in a pillowcase or mesh bag to prevent them from being thrown around too much.
When the wash cycle is complete, place them the dryer. For delicate or extra sentimental toys you may want to dry them with a hairdryer.
Once the toys are completely dry, they are sanitized and ready to be played with again. You should never use a disinfectant on the surface of a plush toddler toy.
How to Sanitize Electronic Toddler Toys
While the hard plastic surface of electronic toddler toys needs adequate sanitizing, it’s important to never soak or submerge them in water or a disinfectant. This will not only ruin the electrical components but also puts you at risk for electrocution.
In this case, you’ll want to take the same steps as cleaning other plastic toys but only wipe them down. Begin by wiping them down with hot soapy water (wring out the cloth first so it’s damp and not dripping). Pay extra attention to remove dirt that may have formed around buttons, screens or any other hard to reach place.
Once the dirt has been removed, use either a disinfecting wipe or a cloth dipped in a bleach solution (2 teaspoons of household bleach for every 4 cups of water) to wipe the toys clean. Once again, ensure the solution remains on the toys for the proper amount of contact time.
If the instructions say so, wipe the toys clean with a clean damp cloth. Once the toys have been left to completely air dry, they will be safe for your toddler to enjoy again.
How Often Should I Sanitize My Toddler’s Toys?
How often you should sanitize your toddler’s toys at home ultimately depends on how often they’re played with.
Generally speaking, you should sanitize toys that are used on a daily basis once a week. You should spot clean or wipe them down more frequently if your toddler often places them in their mouth or they fall on the floor in highly trafficked areas of your home.
If there is an illness going around in your home or community, you should sanitize every few days or even every day if needed.
Extra Points to Keep in Mind
Don’t forget to clean the bin, shelf or drawer that toys are stored in too! There’s no point in spending the time to sanitize toys if you’re just going to put them back into a dirty storage area.
Please keep in mind that these tips are provided for household use only. If you run a daycare, school or any other activity that’s publicly available to children, please follow the cleaning guidelines of your organization or local health authorities.
Sanitizing your toddler’s toys on a regular basis is an important step to keep your whole family healthy. Looking for help with keeping the rest of the house clean? Check out Sheiner’s Cleaning Products to help keep your home sparkling while protecting your family and the environment.
]]>
https://sheiners.com/blogs/news/eco-friendly-ways-to-clean-your-patio2020-05-27T21:22:00-04:002021-03-15T18:09:10-04:00Eco-Friendly Ways to Clean Your PatioVictor Sheiner
There’s nothing worse than relaxing in the backyard and being distracted by the dirt and grime covering your patio. At the same time, you don’t want to have to resort to harsh chemicals to clean your patio at the expense of the environment. Luckily, there are plenty of ways you can protect the environment while still getting rid of dirt and stains.
Whether you have stains on your patio or you just want to keep it sparkling clean, here are some eco-friendly ways you can clean your patio and keep it that way.
Prevent Your Patio From Getting Dirty to Begin With
An ounce of prevention is worth a pound of cure! Doing your best to keep dirt away from your patio in the first place goes a long way in helping to keep it clean. Obviously, it’s impossible to keep something perfectly clean in the great outdoors but that doesn’t mean you can’t do your best.
Patio umbrellas and awnings are one way you can keep your patio clean. The more of your patio that’s covered, the less likelihood of things like bird droppings, berries and pollen landing underneath. Umbrellas and awnings are a win for your patio, the environment and avoiding a sunburn.
The second preventative measure you can take is to regularly sweep and hose down the patio. This will prevent whatever dirt or organic materials that do make it onto your patio from being able to really set themselves in. The longer they sit on your patio, the harder they’ll be to get out, especially things like berries that will leave a stain. The best solution is to prevent that from happening in the first place.
Clean Your Patio With a Hose or Pressure Washer
A little bit of water can go a long way in deep cleaning your patio in an eco-friendly way. Pressure washing your patio is a great way to remove dirt, especially when it’s really set in and has been there for a while. You’ll absolutely notice the difference when it’s finished!
If you don’t have access to a pressure washer, a hose can do a good job of cleaning as well. For the best results, use a nozzle and put it on the narrowest stream possible; the higher the pressure the more dirt it will lift up.
Obviously, your patio doesn’t need to be pressure washed every week. A good approach is to pressure wash it in the spring to get rid of all the winter dirt and then maintain that freshly cleaned patio by hosing it down on a weekly basis.
While pressure washing or hosing down your patio may not use any sort of cleaning products or chemicals, you’ll want to conserve how much water you use to keep it as eco-friendly as possible.
Make sure all furniture is moved out of the way so you don’t waste water while doing this in the middle of the process. You can also give your patio a good sweeping beforehand to minimize the amount of dirt that needs to be hosed away.
Give Vinegar a Try
Vinegar can be an effective way of cleaning your patio using products you probably already have around the house. It’s more powerful than water alone but without the harmful effects of chemical cleaning products.
How to Clean Your Patio With Vinegar
Your first step should be to sweep away any existing dirt.
Vinegar can kill any plants it comes into contact with, so make sure to move any planters or cover up any plants in gardens at the edge of the patio. If there are weeds you want to get rid of, this is a good chance to kill two birds with one stone!
Once you’ve finished sweeping, take a bucket or watering can and mix a solution that’s half water and half vinegar. Pour this solution all over the patio (watching out for plants!) and let it sit for 20 minutes.
After you’ve let the vinegar solution sit, scrub the patio clean with a brush and then mop or hose down the patio with clean water. Let the patio dry to make sure there are no more traces of vinegar and then put the furniture and flowerpots back where they belong.
Scrub Your Patio Clean
It may be easier to let the hose do the heavy lifting, but sometimes you need to use a bit of elbow grease. Start with sweeping the patio while it’s dry and then give it a quick hose just to get it wet. You may also want to add some patio cleaner or biodegradable soap.
Once the patio is wet, get out your stiff-bristled deck brush and get to work! Once you’ve scrubbed every inch of the patio, hose it down once again to get rid of all the dirt and then sit back and enjoy the sparkle.
Use Biodegradable and Non-Toxic Patio Cleaning Products
Whether you’re using a pressure washer or some good old fashioned scrubbing, one of the best ways you can clean your patio without harming the environment is to choose the right cleaning product.
When choosing an eco-friendly patio cleaner, choose products with labels such as “eco-friendly”, “biodegradable” or “natural”, like Sheiner’s Stone and Tile Cleaner, so you know it won’t do any harm.
---
There’s no need to choose between protecting the environment and having a clean patio. With these tips and Sheiner’s eco-friendly patio cleaning products, you’ll have your patio sparkling clean in no time. Happy summer!]]>
https://sheiners.com/blogs/news/5-easy-ways-to-get-odors-out-of-the-carpet-in-a-new-home2020-05-24T17:46:00-04:002021-03-15T18:08:38-04:005 Easy Ways to Get Odors Out Of The Carpet In a New HomeVictor Sheiner
The papers are signed, the deal is closed, you open up the door to your new home and....ew, what’s that smell?!
Sometimes when you move into a new place, whether it’s a house you’ve just purchased or a rental apartment, you walk in on that first day and uncover some smells you didn’t notice in previous visits. While carpeted homes are lovely on the feet, they can unfortunately trap a lot of odors that don’t depart along with the previous residents.
If your new carpet has some less than pleasant smells, this guide is for you. Here are 4 easy easy ways you can remove odors from the carpet in your new home.
1. Open the Windows
While opening the windows won’t necessarily remove the carpet smell itself, a bit of fresh air can go a long way in getting rid of any bad smells in the short-term. If the house has been unoccupied for some time, you’ll definitely want to get the fresh air circulating.
If dampness is the reason behind the smell in the carpet, opening the windows can help the carpet dry out. This won’t entirely remove the smell in the long-run, but will prevent it from getting worse and give you some fresher air to enjoy in the meantime.
Even if the carpet in your new home smells as fresh as a rainbow, we still recommend you open up the windows anyways! Nothing beats the fresh smell of the outdoors while you explore your new abode. You’ll also save money on the air conditioning bill if it’s warm outside, instead of movers and family letting in the hot air and making it go into overdrive.
2. Turn On a Dehumidifier
As we mentioned above, dampness is a common cause for why a carpet smells. Beyond opening the windows to bring in some fresh air and help dry things out, running a dehumidifier can also help remove the dampness that is causing your carpet to smell.
If dampness continues to be a problem, you should investigate the cause and address it directly. After all, the best way to get rid of carpet odors is to prevent them from happening in the first place.
3. Use a Deodorizing Carpet Cleaner
It’s not a bad idea to give the carpets a thorough cleaning after moving in, but this is absolutely critical if the carpets smell bad. Whether you rent a machine or call in a professional, getting your carpet shampooed is a great way to remove dirt, allergens, stains and odors from deep down within the carpet. A simple vacuuming just won’t do the trick.
There are a lot of different carpet cleaning products out there, but in this case, you’ll want to choose a carpet cleaning product designed to remove stains and odours. You can even use these products as a spot cleaner, whether it’s a particularly bad stain or for future spills.
It’s best to get the carpet shampooed before you move your furniture in. This will make sure every spot gets deep cleaned to get rid of any smells that could be lingering. However, if you were caught off guard by the smell, it may be too late. In this case, you can simply go around the furniture and do the best you can.
In high-traffic areas of your home, you should ideally be shampooing your carpets once or twice a year. If the first cleaning didn’t quite remove the smell you may want to schedule your next cleaning for a few months down the line to tackle what’s still lingering in the carpet.
4. Baking Soda
If you’re looking for a DIY carpet odor removal solution, baking soda is your best friend. That’s right, it’s not just for your fridge or school science experiments!
Using baking soda to get smells out of your carpet is pretty simple. First, block off the area so that no people or pets come walking through. Next, take your baking soda and sprinkle it liberally over the carpet. You can also use baking soda as a spot treatment, but in the case of a new home, you’ll probably want to be safe and do the whole thing.
How much baking soda you use will depend on the size of the carpet and how much needs to be treated. If you’re doing the entire carpeted area of your home, you can probably expect to use at least a box or two. If you have a high pile carpet, you should work the baking soda into the carpet with your hands so it can work its magic well beyond the surface.
After you’ve applied the baking soda to the carpet, let it sit overnight (or at the very least for a few hours). Just like it does in your fridge, the baking soda will absorb the odors the carpet is holding on to.
When the next morning comes around, simply vacuum up the baking soda and the odors will go with it. If the carpet really smells bad, it may take more than one treatment as baking soda can only absorb so much at once.
5. Buy a New Carpet
We hate to have to bring this up…but sometimes the best way to get rid of odors in a carpet is to get rid of the carpet itself. While all of the tips we’ve offered above should do the trick in most cases, sometimes a carpet is just beyond saving. This is especially true if the carpet is old, the previous residents were heavy smokers or the carpet was heavily soiled from pets.
If you do go the route of having to buy a new carpet, don’t forget to use the advice above on a regular basis to keep your carpet sparkling clean and stay ahead of odors setting in in the first place.
---
Nobody should have to live with a bad smelling carpet. By using the tips above (and Sheiner’s very own carpet stain cleaner and odor remover!) the odors in the carpet in your new home will become a memory of the past, just like the people who lived there before you.
]]>
https://sheiners.com/blogs/news/how-your-smart-home-assistant-can-help-keep-your-house-clean2020-05-21T16:17:00-04:002021-04-26T12:44:49-04:00How Your Smart Home Assistant Can Help Keep Your House CleanVictor Sheiner
If you’re looking for some new ways to keep your house clean, have you thought about enlisting a smart home assistant for some help?
Here are 3 ways that use you can use your Google Home or Alexa for house cleaning.
If you’re looking for some new ways to keep your house clean, have you thought about enlisting a smart home assistant for some help?
Believe it or not, they can do so much more than answer questions, dim the lights and tell you jokes. No, they won’t actually clean for you. They can, however, help set you up for cleaning success (and a sparkling clean home!).
Here are 3 ways that use you can use your Google Home or Alexa for house cleaning.
Help You Order New Cleaning Products
Why go to the store to buy new cleaning products when you could have them delivered to your house? Better yet, why order them on your phone or computer when you can do it all through voice shopping?
Never run out of your favourite household cleaning products with your smart home assistant’s help. When you notice you’re running low, simply ask it to order more, instead of telling yourself “you’ll do it later” and end up shorthanded when it’s time to clean.
Don’t forget to ask for Alexa or Google’s help in finding the right cleaning products. The last thing you need is something that could damage your hardwood floors, isn’t safe for the kids or comes in a bottle that’s way too big.
Remind You of Your Cleaning Schedule
Do you always forget to take the garbage out to the curb? Forget to scrub the shower before you can see the dirt from ten feet away?
A cleaning schedule is a great way to stay on top of household cleaning and make it less overwhelming. Whether you ask your smart home assistant to give reminders itself or you use it with a cleaning schedule app, Google and Alexa can give you the nudge you need to keep things sparkling clean.
While you’re at it, why not ask it to play some music while you scrub the floors?
Schedule and Control Your Robot Vacuum
While we did say your smart home assistant can’t actually clean your house for you (yet?), they come pretty close. With robot vacuums like iRobot and Roomba, you can schedule, control and keep track of the vacuum all through Alexa or Google.
“Alexa, ask Roomba where it is.”
“Ok Google, stop vacuuming.
“Alexa, ask Roomba to schedule a cleaning job on Monday at 11 am.”
We’re not quite at flying cars yet, but the future is definitely here with voice-controlled robot vacuums. If you want to get really advanced, you can set up a map of your house and tell the vacuum which specific room you want to be cleaned!
---
The future is here, so you might as well embrace it and use your smart home assistant to help keep your house clean! The reality is that they can only do so much - you also need the right cleaning products to finish the task.
Sheiner’s cleaning products go beyond simply cleaning to protect the beauty of your flooring and furniture. View our product catalogue online...or why not ask Alexa or Google for some more info?
]]>
https://sheiners.com/blogs/news/11-fantastic-reasons-why-you-need-to-start-green-cleaning-today2020-03-18T13:55:00-04:002021-03-15T18:08:21-04:0011 fantastic reasons why you need to start green cleaning todayVictor SheinerUsing gloves is good practice, but natural cleaning supplies are unlikely to cause you any issues if you get them on your skin. Natural ingredients and toxin-free products are the way to go...
]]>
Here at Sheiner’s, we have seen a huge increase in the demand for eco-friendly cleaning products. As result we now sell a large selection of products that are non-toxic and safe for the environment.
But why is everyone making the switch? Well, there are many benefits to using eco-friendly cleaning products, and here are our favourites:
Less toxins released into the environment
This is a big one. We make our hardwood floor cleaners non-toxic because understand that if even a small amount ends up in the environment then it could create a big problem in the ecosystem.
It is easy for this to happen too. What happens when you dispose of the empty bottle? You might rinse it out or throw it in your bin? If these break and make their way into a stream then the consequences could be huge.
Better for your health
All those chemicals aren’t good for your health either. When you spray around normal cleaning products, small droplets will be carried in the air and enter your lungs.
With toxin-free cleaning products like ours, you don’t have to worry! There is nothing in them that is bad for your health so if you breathe in a few droplets it doesn’t matter.
Less contamination of water
Contaminated water is a big problem for water treatment plants. On top of that, it is a big problem for wildlife too. Toxic cleaning products have been known to leak into lakes and rivers during manufacturing and kill large numbers of plants and animals.
Eco-friendly products avoid that. They are safe for plants and animals so if they make it into the water stream then it is of no major consequence.
Less indoor air pollution
Indoor air pollution is a big problem even before you start spraying around a load of chemicals. We spend large amounts of time in our homes, so we want that air to be good quality.
If you want to breathe clean and healthy air, then you need to make the switch to products with no toxic chemicals in them. It will benefit everyone that walks into your house.
Protect your pets and children
No one likes to think about the consequences of their child or pet accidentally drinking something from the cleaning supplies cupboard. But with Sheiner’s eco-friendly range, you don’t have to worry.
Obviously, you want to avoid this situation, but if it did happen then our products are safe. Far safer than the toxic equivalents anyway.
Less harmful to your skin
Most cleaning products recommend that you wear gloves as they can cause irritation or even chemical burns. Yet eco-friendly cleaners are far less aggressive in this sense.
Using gloves is good practice, but natural cleaning supplies are unlikely to cause you any issues if you get them on your skin. Natural ingredients and toxin-free products are the way to go.
Better for people with allergies
We’ve discussed indoor air pollution already, but this is an even bigger concern for people with allergies or respiratory conditions.
Many normal cleaning products can cause allergy flare ups and breathing difficulties among sufferers, but eco-friendly alternatives are less likely to do this.
Less aggressive on surfaces when used regularly
Many of the chemicals in traditional cleaning products work by being harsh on your floorings and furniture. But when used repeatedly this can result in damage to these surfaces.
Natural substitutes are gentler without loss of cleaning power. This means you are kinder to your surfaces and increase their lifespan.
Less smelly
The smell of toxic cleaning products can be overwhelming. You can feel those chemicals hitting your nose and throat every time you breathe.
Eco-friendly products provide a softer fragrance that makes cleaning a more pleasant and less intense sensory experience.
Fewer risks of injury
With all non-toxic components comes a decreased risk of injury. We’ve talk about skins irritation, but chemical products can cause burns and eye damage too.
It is easy for small amount of cleaning fluid to splash into your eyes. With chemical-based products this could have serious consequences. Eco-friendly ones would be far less severe.
Biodegradable
All eco-friendly products in our range are also biodegradable. This means that when you throw them away you know that they will not be hanging around on the planet forever.
Few traditional cleaners are biodegradable and will exist in landfill for hundreds of years. This leads to increased possibility of leaking into water sources and habitats.
What more could you want?
Make the switch to one of our eco-friendly, non-toxic and biodegradable products today and realise all these benefits for yourself.